In today’s quickly changing world, the phrase “now trending” appears almost everywhere. We see it in marketing schemes, news alerts, Twitter feeds — anything to grab our attention. Trends play a significant role in influencing swaths of cultures to lean one way or the other, particularly in the arts.
It’s easy to see trends in underwater photography by surfing through social media photography forums, which can be great places to glean inspiration from new ideas and concepts. It’s important to remember, however, that many of those images could be the result of extensive editing. Some photo contests now ask for the RAW form of the winning images to ensure that the photographers’ skills and equipment rather than postproduction software created the photos.
Trends aren’t always new ideas but can be recreations of proven classics done differently. It can sometimes be difficult, however, to figure out how the shooters made some of the interesting images. While we can see the skills used, only experience can truly teach us the techniques. The following are some of the latest trends in underwater photography. I encourage you to try something different.
Motion blur is currently a popular technique for underwater photographers. It’s a great way to convey the energy of movement, regardless of angle or whether the subject is moving. The mechanical aspect of capturing the motion is simple: Slow your shutter speed, allowing ambient light to enter the frame after the flash has cycled and while the shutter remains open. If your subject is moving, the camera will catch the blur. If the subject is stationary, panning can create the appearance of movement. The direction of the blur (either in front of or behind the subject) will depend on whether you are using front-curtain or rear-curtain synchronization on your strobes.
When creating a blur, strengthen your composition by providing a sharp point of reference to anchor viewers in the image and allow them to discern what is happening in the photo. If you are photographing a school of fish, for example, quickly scan the school of fish, search for their eyes, focus on one or more of the fish in your leading line, and then release the shutter and hold the camera steady. The strobe flash will freeze the leading line as the sun provides continuous ambient light, which will allow the camera to capture the movement of the fish. This technique is great for singular, fast-moving fish as well as schooling fish or anything reflective.
To exaggerate the effect, use the same technique as above, but begin your pan and release the shutter while panning laterally in the same direction that the fish are moving but slightly faster to create a trailing edge with a more pronounced effect. Any backscatter or particulate in the water will also become part of the grand design, which can come in handy when you are shooting in a turbid environment.
For these or any other techniques, the best advice boils down to practice and shot selection. If you have a big trip coming up, practice these techniques ahead of time. Getting a feel for how they work and developing a little muscle memory beforehand will help when you need it the most. You might even kick off the next big trend.
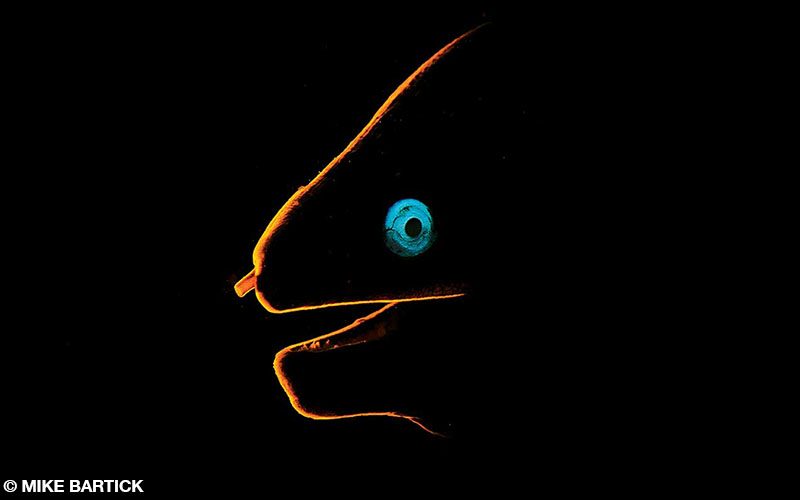
Orange Eel
Low-key image
1/100 sec, f/14, ISO 320
Low-key lighting creates a dark feel. Alfred Hitchcock is famous for using shadows to emphasize low-key light. This technique, which uses shadow to emphasize strong lines, works particularly well when the subject is macabre or has definitive shapes. Try different lights or experiment with colors; for an added touch, try using a snoot on the subject’s eye to bring back a little color. A high f-stop will keep the foreground shadow dark, while a slow shutter speed will allow for the colored backlight to creep into the frame and do its job. Using a colored light can be helpful when you are shooting on the substrate or where the subjects live within objects or among algae or seagrass. Some new lights allow a shooter to change the color on the fly by using a flip-down filter or a color wheel. Some lights can also pulse with a higher intensity when using a fiber-optic trigger.
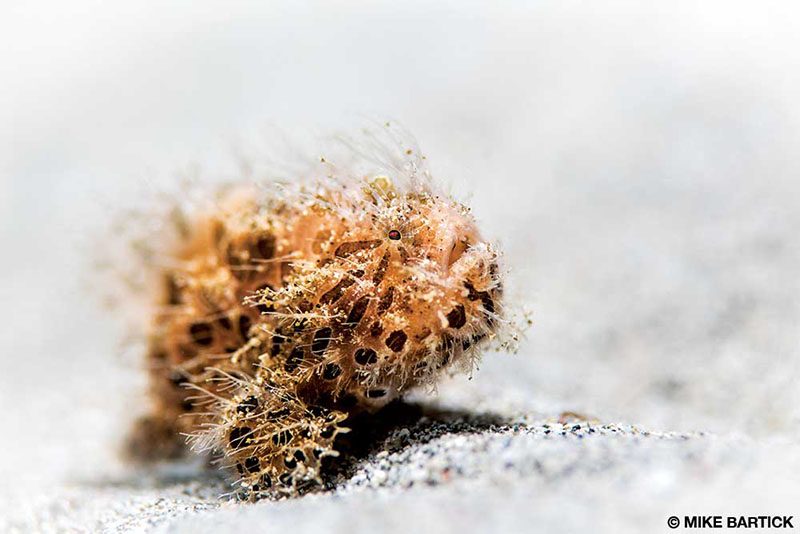
Snowflake Hairy Frogfish
High-key image
1/200 sec, f/6.3, ISO 80
High-key photography is another emerging style with old roots, but some underwater shooters mistake it for overexposure. This technique, which works well on land or in water, borrows heavily from studio photography with multiple light sources. In a studio, the key light is the primary source measured for exposure before the shots and could either be high key or low key. When done correctly, the background will appear washed out, creating an image without any shadows or contrast, giving it a bright, sanguine feel.
There are several approaches, but the basic principle is the same: Fill the shadow. One strobe at the 12 o’clock position above your camera will create a shadow below your subject, and a second strobe positioned low, at approximately 9 o’clock or 3 o’clock, will fill the shadow. This technique is tricky and not possible in every situation, but it is fun to attempt.
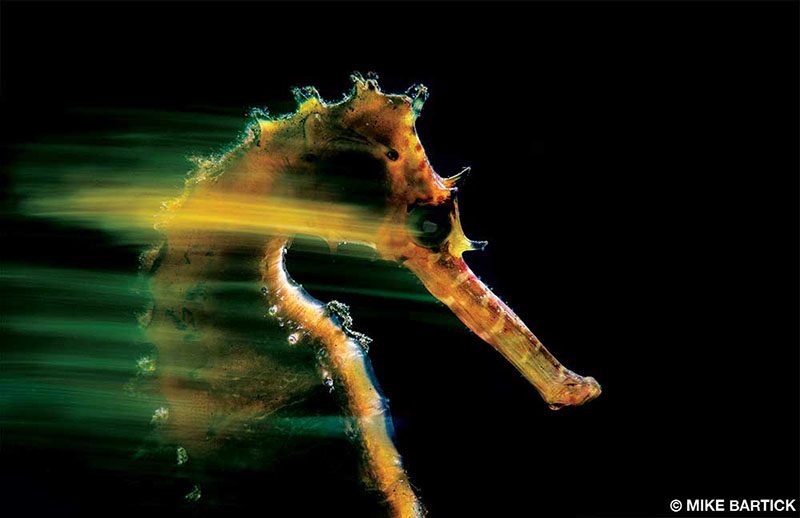
Speeding Seahorse
Strobe with off-camera light and snoot, slight pan to the right
1/8 sec, f/18, ISO 125
With the freedom of using off-camera lighting with snoots, you can move your camera as little or as much as you like. Employing a friend or a tripod to hold the snoot in a stationary position is essential for creating this style of image. Instead of a dramatic swing of the camera, a macro shot with blur will require only a slight twitch. Playing with this technique is a lot of fun and will deliver instant results.
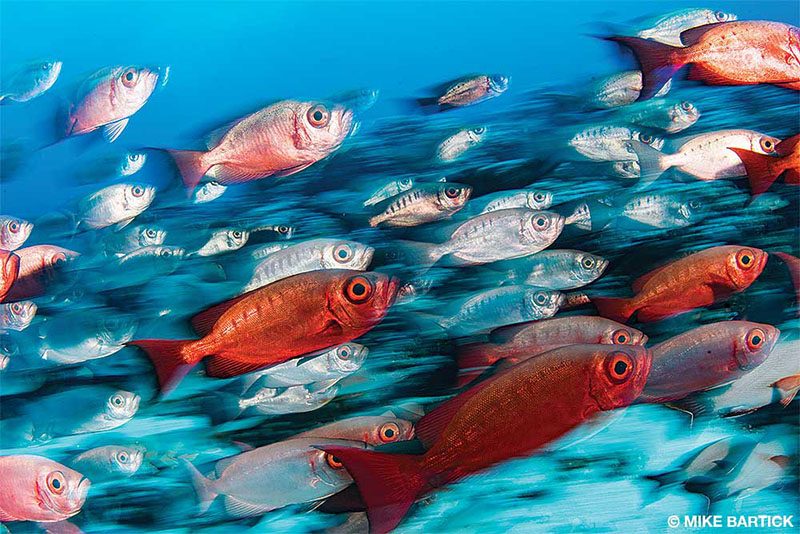
Snapper Rush
Movement and panning
1/8 sec, f/29, ISO 320
This school of snappers was very nervous about several nearby marauding sharks and bolted from danger with audible energy. As they moved, I released the shutter and panned slightly faster in the same direction as the fish were moving. This technique works well for larger animals and when the ambient light is strong. The flash from the strobes provides the color and contrast, while the ambient light and slow shutter speed help to capture the movement. As you can see from the blur behind the fish, I used rear-curtain synch on my strobes.
With slight modifications to lighting, this technique can create some unusual macro images too. Photographers usually shoot macro subjects using higher f-stops and shutter speeds, so we must allow more light to enter the frame. Controlling it using an off-camera light and a snoot is helpful, particularly when panning. It is also important to control ambient light, which can help to create a texture in the image when panning, unlike regular snoot shots.
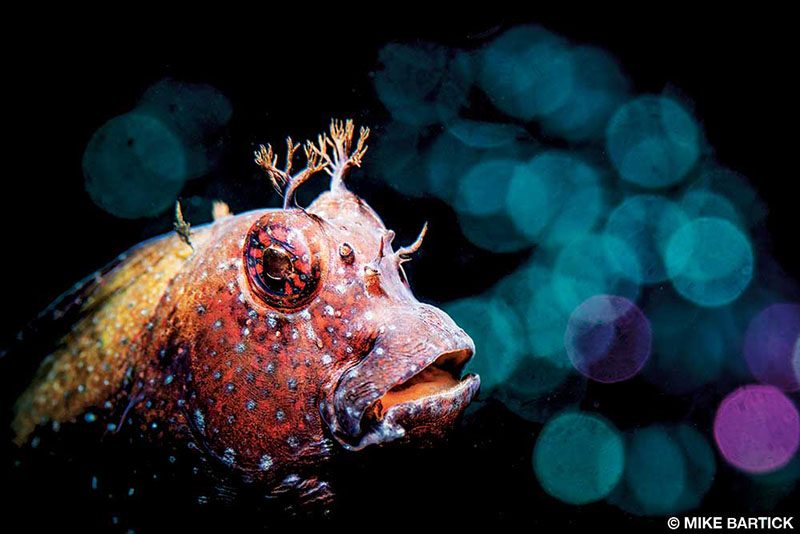
Blenny with Bokeh
Snoot with backlighting and steel wool
1/100 sec, f/9, ISO 100
Bokeh is a naturally occurring photographic phenomenon that is primarily achieved by nearness to the subject and open f-stops. It’s possible to enhance the bokeh effect by using something reflective such as embellished fabric or steel wool in the background.
Place clean steel wool approximately 8 inches to 12 inches behind your subject, and illuminate it with your light. The reflected light will create a pattern in the background, which is further distorted by the proximity to your subject and a wider f-stop. A large aperture such as f/9 or greater will smooth the bokeh texture, making it appear as free-floating bubbles, and a smaller aperture such as f/14 will make it appear more like octagons with harder edges.
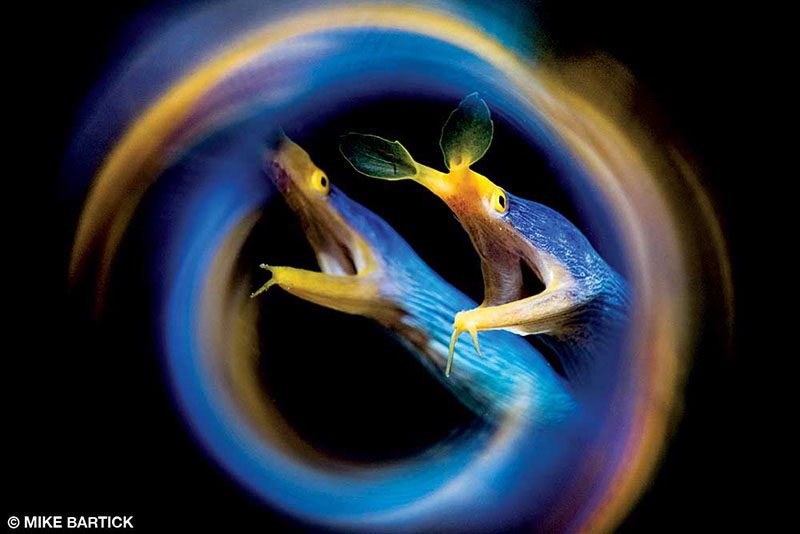
Blue Ribbon Eel Swirl
Reflection tubes
1/200 sec, f/14, ISO 125
Using reflection tubes (also known as swirl tubes) is another simple way to create interesting and unique images. A reflection tube is a chromed aluminum pipe held up to the outside of your lens port. The chrome creates a distorted swirling reflection that your camera’s lens will pick up. The reflection from the inside of the tube will appear on the outside edge of the image. The pattern changes almost like a kaleidoscope as you move around photographing your subject.
It’s possible to improvise a swirl tube using PVC or copper pipes with a reflective material inside, or you can purchase a premade tube that has a 67mm thread mount to fit on a flip adapter made for diopters. With a wider angle of view, such as with a 60mm macro lens, you should use a wide-diameter tube. For a longer lens, such as a 105mm macro, you will need a longer tube.
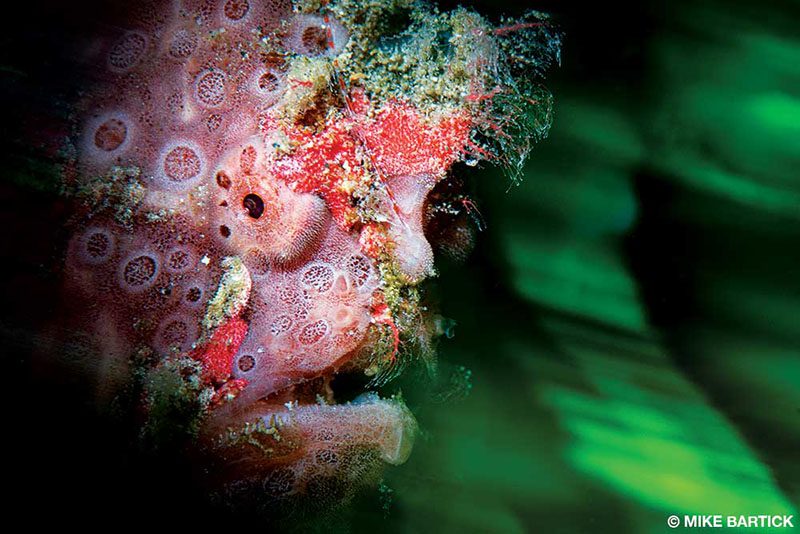
Frogfish Blur
One strobe with an off-camera fiber-optic snoot
1/15 sec, f/16, ISO 250
Effectively using a snoot in a sunny, shallow environment can be challenging due to the abundance of ambient light. Even at a low ISO and fast shutter speeds, ambient light can still bleed into the frame. Rather than trying to eliminate that ambient light, use it to your advantage by panning your camera. Concentrate the strobe flash on your subject, focus on the eye, begin a slow pan, and release the shutter. Slowly moving the camera as you release the shutter will help to keep the subject sharp and in the frame.
Colored light can provide ambient lighting on a night dive. Blue and red are included in most lights on the market today, so have fun and experiment with what you might already own.
© Alert Diver — Q2 2020