Recently we received a photo request for images of a specific dive site in our local kelp forest, and the deadline was immediate. Our knee-jerk reply to the client: “No problem — we can do it!” Delight was soon replaced with dread, and our enthusiasm fizzled as we scrutinized our photo libraries and found only two useable wide-angle photos of the distinctive site. Talk about an impulsive screwup! And worse, it was March — the dreaded spring season.
To us, springtime brings to mind the color green: St. Patrick’s Day, new plants emerging from the soil and, most of all, green water. In our local sites off San Diego, upwelling from the nearby submarine canyon can give the water a dark, murky appearance at any time of year, but this is especially true in the spring. Plankton blooms and repeated onslaughts of storms are notable features of the season. On several occasions our local kelp forest provided us with very strong reminders that springtime diving is not for the fainthearted; at times the area seems to become the epicenter of appalling conditions. Miraculously, we had two successive days of calm seas and reasonable visibility, so we were able to pull off the assignment. But if not for the tips, tricks and techniques that follow (and a healthy dose of luck), photographing the underwater jungle can be a maddening endeavor.
Know Your Site
Our tale related the challenges of seasonal variations in conditions, but there are a number of local factors that are subject to change. Vast differences exist between kelp forests. In California, the kelp beds of San Diego and Monterey Bay are bathed with plankton-dense water and rarely bear much resemblance to the southern Channel Islands, where clear, blue water is more common. Wide-angle photography can therefore be difficult in the more nutrient-rich sites. However, they are a mecca for photographers seeking amazing macro subjects. The bottom line is that in the kelp, as with any dive location, your chances of photographic success increase greatly if you are familiar with the local weather patterns, seasonal variations and endemic marine life. There is no substitute for experience; so if you don’t have it, reach out to experienced trip leaders or local dive shops to help you get up to speed. Local knowledge is paramount.
Bring the Right Tools for the Job
Absolutely crucial to the task of shooting in kelp forests is the right equipment. Primary challenges in such sites are low visibility and the presence of particulate matter, which, unless you want your photos to resemble a snowstorm, make working close to your subject vital. For wide-angle photography, short-focal-length zoom lenses are optimal (we often use super-wide fisheye zoom lenses). Having a lens with zoom capability will give you flexibility for encounters with subjects of varying sizes over the course of a dive.
For macro work, again the ability to focus while close to your subject remains critical. Our primary choices are 60mm macro lenses or, if we’re trying to capture tiny subjects, 100mm macro lenses with wet or dry diopters (auxiliary close-up lenses).
Ambient light can be limited in the kelp forest, not only as a function of depth and water clarity, but also because the kelp canopy restricts light penetration. We prefer high-powered strobes with fast recycle times, but strong video lights will also fit the bill, particularly with newer cameras that have astonishing high-ISO performance.
Shooting Kelpscapes
Very few underwater scenes can rival the beauty of a kelp forest — the light passing through the fronds and the ethereal green-gold glow that results are enough to humble even the most jaded globetrotting underwater photographer. However, capturing this splendor is a careful balancing act.
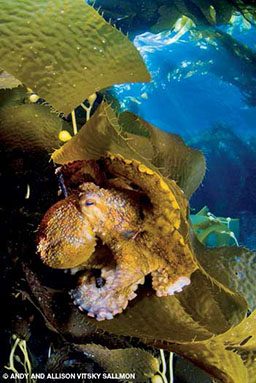
As sunlight diffuses through the kelp canopy, a slow shutter speed is often required to gain reasonable clarity in the background exposure. This is challenging because temperate-water sites can be particularly affected by current and strong surge. Slow shutter speeds can prove to be very frustrating when motion blur inadvertently becomes a constant feature of an entire day’s worth of images. Using a higher ISO helps with this, but beware: Go too high, and your images may become “noisy.” (Noise is an undesirable digital artifact that obscures the image; it varies from camera to camera but increases with relative ISO.) We have found that the sweet spot in background exposure changes with dive site, camera angle, time of day and depth, so remember to reference your digital camera’s LCD screen. Evaluate the histograms and graphic display, and adjust accordingly throughout the dive.
You’ll have no shortage of foreground subjects: anemones, sea stars, gorgonians and the kelp itself abound, but sometimes the visibility can be very limiting. Our recommendation is to use the “10-percent rule” — shoot your chosen foreground subject within 10 percent of the total visibility. If the visibility is 20 feet, you should endeavor to be no further than 2 feet away from your subject.
The basic principles of strobe positioning are also important. We prefer our strobes be the same distance from the sides of the housing as they are from the subject, so the closer you are to your subject the closer your strobes should be to your housing. At times, this will be very close indeed. In extremely challenging conditions, we have even used wide snoots to light an isolated foreground subject in an attempt to limit backscatter. Finally, as painful as it is to admit it, some days are better thought of as practice days since you won’t get a single image worth keeping.
Big Critters in the Kelp: Be Prepared
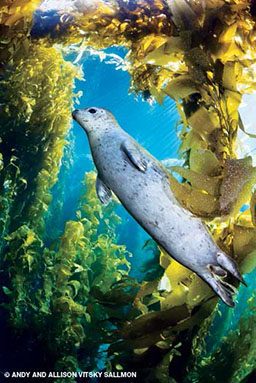
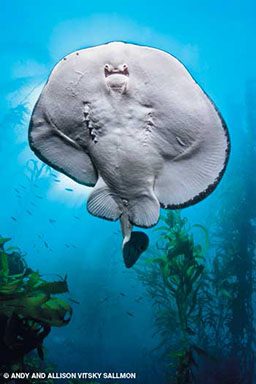
Since kelp forests are so nutrient-rich, they attract schooling fish and an amazing array of large predators, including sea lions, seals, rays, sharks and giant sea bass. Beautiful gelatinous invertebrates such as jellyfish and salps can also be encountered, and we have even been fortunate enough to witness a chaotic market squid mating ritual (the so-called “squid run”). These opportunities cannot be planned in advance, so photographers must be prepared to shoot, adjust and reshoot rapidly.
When we are hoping to photograph larger, faster animals we use “grab-shot” settings that include a shutter speed adequate to capture fast motion (1/125 sec at a minimum), balanced with relatively open apertures (f/5.6 to f/8, depending upon conditions, subject size and anticipated distance from the subject). We pull our strobes out to the sides and behind the center line of the housing to minimize backscatter and flare and then set them at a quarter to half power to enable short recycling times. Strobe positioning, strobe power and camera settings are adjusted as needed when we encounter creatures that don’t immediately disappear. As with most other subjects, patience and getting as close as possible are the keys to success.
Looking Close: Kelp Minutia
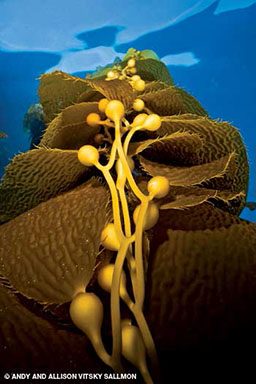
Kelp beds are rich with macro life, and to us they represent a bottom-to-surface vertical structure that is endlessly fascinating. Furthermore, kelp lends itself to the creation of appealing macro images because holdfasts, bladders and stalks form interesting geometric shapes. Nudibranch enthusiasts in California frequent certain local kelp beds in search of unusual specimens, and it is not uncommon for divers to report seeing more than 20 different nudibranch species on a single dive. Top snails, such as the lovely blue-ring and bright-red Norris’ varieties, make fantastic subjects, as do other invertebrates such as isopods, shrimp and crabs.
One striking way to highlight your subject is with a black background. Unlike countless other frustratingly difficult aspects of photographing the kelp forest, this one is an easy effect to achieve. Simply use a small aperture (f/18 to f/22) and the fastest shutter speed at which your strobes will synchronize (often 1/250 sec). This technique also optimizes your chances of getting sharp focus, as the fast shutter speed will freeze motion and the narrow aperture will maximize your depth of field.
A more complicated shot is the same subject but with a blue or green background — indicative of more light. Shooting upward toward the surface will help in achieving this goal, but a wider aperture (we often start at f/8) combined with a slower shutter speed (1/100 sec or slower, depending on ambient light and depth) will commonly be needed to attain this type of background. Keep in mind this will also make it more difficult to get sharp focus in the desired spot, especially in surge or current or if your subject is mobile.
Even when conditions are ideal, achieving a proper balance of exposure between foreground and background can be difficult. Add in surge, current and poor visibility, and underwater photography in the kelp can seem extraordinarily challenging. While we almost always dive with our cameras regardless of conditions, there have certainly been days in which we have not kept a single image.
Despite these challenges, or perhaps because of them, coming home with a lovely image taken in our local kelp forest is much more rewarding to us than coming home with an equally lovely image taken in clear, tropical water. To be fair, we don’t have to deal with the expense or inconvenience of air travel to take local photos, but we think it goes much deeper than ease of access. To us, temperate images like these are uniquely and uncommonly stunning, conveying not only an appreciation for unusual beauty but also passion, tenacity and old-fashioned hard work.
Kelp Diving 101
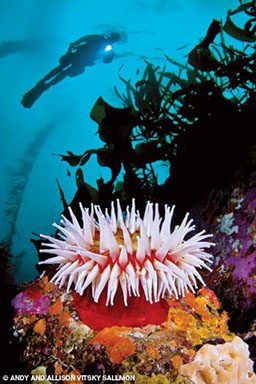
Kelp, a type of marine algae, forms tiered forests topped with a canopy — almost like a rainforest. This rapidly growing organism favors water temperatures between 40°F and 70°F, so using proper exposure protection is the first step toward successful kelp diving and photography. You can’t shoot if you are too cold to concentrate! Most kelp-diving veterans prefer a drysuit or thick wetsuit as well as a hood and gloves. Gloves require particular consideration, as they have to provide thermal protection as well as allow adequate dexterity for manipulating camera controls. Dry gloves are a popular solution.
The concern we hear most often from novice kelp divers is fear of entanglement. As with any new diving environment, it is best to gain confidence with a specialty course and some preliminary dives prior to entering the water with a camera. Avoiding entanglement requires attention during the dive and some forethought; streamlined gear and at least one cutting tool are important.
Paying close attention to your air supply and the location of the boat will ensure you are not forced to maneuver back to the boat on the surface using the dreaded “kelp crawl.” Also crucial is remaining calm should you become caught. In other words, avoid becoming the fork in the kelp spaghetti that spins around repeatedly to determine the source of entanglement.
© Alert Diver — Q3 Summer 2012