In the world of fashion photography, studio shooters use lighting in various ways to create dramatic effects in their images. Light sources from different vantage points can accentuate the model’s features in distinctive ways. This not only adds drama to the image but also creates an element of style — a unique visual signature.
Backlighting and rim lighting are two examples of the techniques studio photographers use to create special visual effects with light. Working in a controlled environment such as a photo studio is obviously much different from shooting underwater. But with a little practice and persistence, some studio techniques can quite effectively transfer to underwater photography.
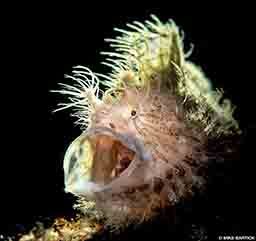
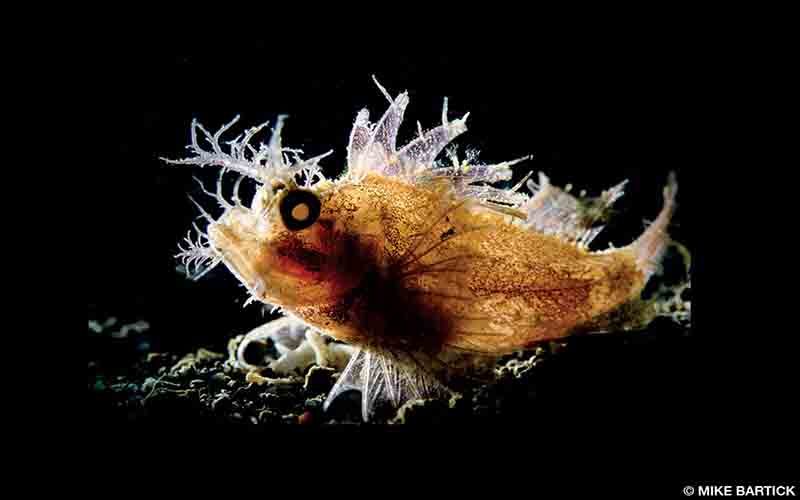
The opportunity to photograph an exotic subject can engender a great deal of excitement, but even the most coveted subjects, such as Rhinopias scorpionfish or hairy frogfish, can appear flat or uninteresting, especially when they are lying on sand. The biggest challenge with these subjects is effectively highlighting the detail that makes them so interesting in the first place. While it is easy to appreciate the beauty of these ornate subjects, it is quite difficult to shoot them well.
“Special lighting for special critters” has been my consistent mantra and has motivated me to develop my use of different lighting techniques. Backlighting, sidelighting, rim lighting and two-point lighting (which I like to call “the works”) have become frequently used tools in my photographic toolbox. My mentor was a master of rim lighting, executing it with a hand-held bulb flash. Taking a cue from him, I carry a torch (dive light) with me and experiment with it in different scenarios and angles. It is not so much the power of the torch that is important, but it is the creative license the torch will give you once you begin to use one in your image making.
Backlighting and Sidelighting
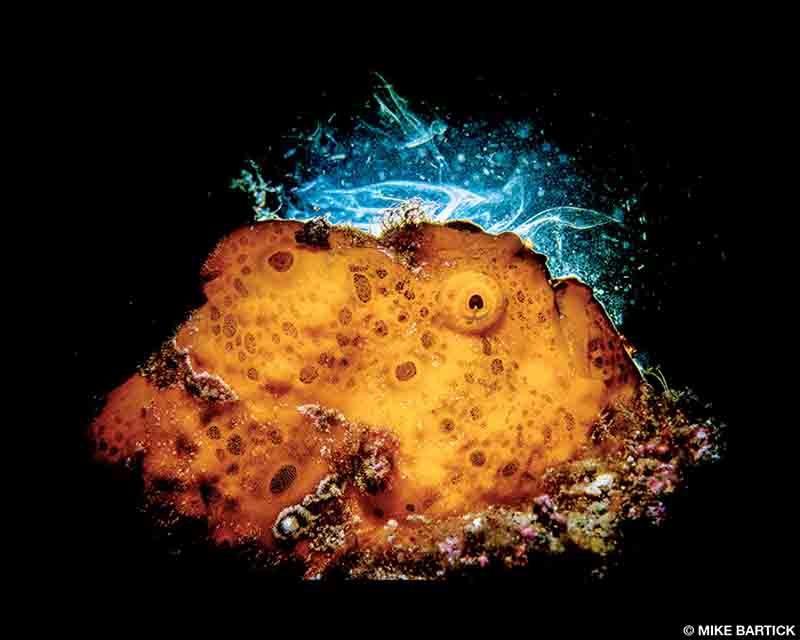
These lighting techniques are not inherently difficult, but making them work well requires practice. Some subjects are better suited to backlighting than others, but do not be afraid to experiment with diverse subjects. Some will work; others will not. Backlighting and sidelighting work best with an off-camera torch, which will grant you the freedom to move around the subject and examine it from different angles. Allow the light to sweep across the back or side of the subject to illuminate its unique texture and features. Try to surround it with a compelling studio-style glow. Sometimes a simple line or distinctive shape is enough to make the composition pop from the background. Make a point of accentuating any such aspect of the subject, and work it.
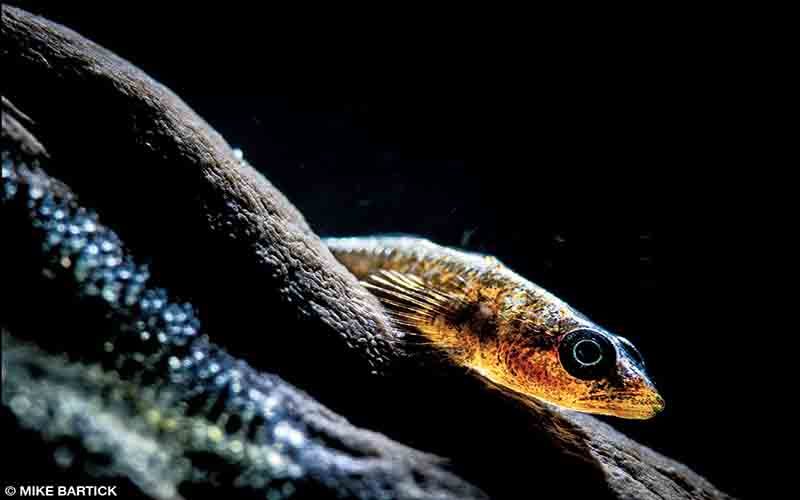
One pitfall with these techniques is that a foreground shadow can sometimes obliterate critical details of your subject. The expressive eyes of a goby, for example, may appear as featureless black dots. Proper implementation of strobe light in the foreground to fill the shadow is key. Lowering the intensity of the flash can work, but sometimes it is at the expense of contrast, leaving you with muted tones. The challenge here is to introduce a fill flash that is delivered with intensity and to the right place on your subject while still allowing the backlit area to shine through.
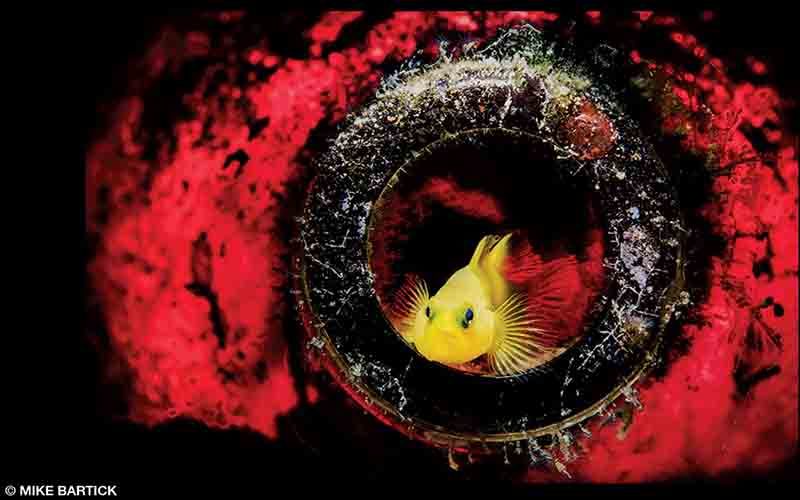
A few torch brands offer both a red light and an ultraviolet light in the same torch head as the normal light. I have experimented with these different-colored lights in backlighting and sidelighting. While these photos might not warrant a portfolio unto themselves, a few examples make for an intriguing change of pace.
Snoots and Two-Point Lighting
Snoots are simple cone- or tube-shaped attachments to a strobe head that narrow the light beam from the flash, enabling the photographer to light a subject with precision. When used effectively, the subject will be lit while the rest of the frame remains in darkness. Snoots can be paired with backlighting or sidelighting for interesting effects, offering more then just a circle of light that surrounds your subject. This form of lighting is highly effective for eliminating confusing backgrounds and controlling your strobe flash angle and flash beam size.
Two-point lighting uses two light sources from opposing angles. The goal with this technique is to create images with strong backlighting as well as effective yet controlled foreground lighting. Some tinkering and experimentation can lead to exciting results.
I like to use a 1,000-lumen torch for backlighting and sidelighting. To make the torch more effective, I attach a polyvinyl chloride (PVC) pipe that is 1 inch in diameter and 5 inches long. I heat one end of the pipe and form fit it around the light head, making a snoot for my torch. This reduces the radial broadcast of light, making it more predictably directional.
For the foreground flash, I use a snooted strobe, which provides control and a method for directing the light to the desired area of my subject. I prefer to use my strobe’s pilot light with the snoot. This allows me to illuminate the point at which the strobe is aimed and further empowers me to adjust the size of the beam’s iris to my liking.
Your primary light source will be the torch positioned behind the subject. Orient your backlight in a way that allows the light to rake across the subject at an angle rather than pointing it directly into your lens; this will ensure the best light quality without undue flare. The idea is to create a silhouette-style shot using the light from behind the subject to softly highlight its edges and then fill in the shadow with a snooted strobe flash.

I have also tried using two torches and no strobe but have had mixed results. Getting sufficient illumination from a continuous light source requires a slower shutter speed or a higher ISO, and this can lead to motion blur. A little strobe light in the foreground, however, will easily freeze the motion from marine life while simultaneously adding authentic color. This style of shooting may actually benefit from limiting ambient light, ideally by using a low ISO (100) and fast shutter speed (1/200). This is especially important in shallow or sunny environments and less so at night.
My favorite lens choice for this is the 105mm Micro-Nikkor, because it narrows the angle of view and allows the use of the light’s beam but excludes the torch from the frame. A 60mm macro lens works well for larger subjects such as Rhinopias, but these techniques can also be applied when shooting wide angle, too — as long as you can obscure the presence of the torch in the frame. A 100 mm or 105 mm lens is also preferred for full-framed sensors.
Advantages and Pitfalls
Intentional, strategic use of lighting offers interesting and creative options in underwater photography. Consider both the benefits and the challenges of leveraging light.
Advantages:
- Freedom to move around the subject
- Ability to create unique images of common subjects
- No synch speed limits (unless you use a strobe)
- Precise light placement
- Backlighting and sidelighting
- Transilluminates transparent subjects
- Can be accomplished in a sunny environment
Pitfalls:
- Shadow in the foreground without fill flash
- Excessive illumination of particulate matter (backscatter)
As you can see, the advantages far outweigh the pitfalls on my list. I hope you will find the same with practice. The power of creativity is often right in our hands, and we do not even realize it. Try placing your hand-held torch or modeling light behind your subject or off to the side, and see what kinds of mysteries you unlock. Experiment often and with different subjects, and enjoy the process of learning.
| © Alert Diver — Q1 2018 |