Are you dependent upon your GPS, or do you rely on your innate sense of direction? Whichever method you use, you can count on the fact that neither is a reliable way to navigate the underwater environment.
Whether you are searching for that snapper hole on the reef or attempting to find the anchor line at the end of a dive, swimming in the right direction can be critically important for every diver at some point in his or her diving career. Additionally, good navigation skills have the potential to make virtually any dive more informative and enjoyable. Underwater navigation seems to come easy for some divers and is harder for others. But any diver can master the art of underwater navigation by applying a small amount of background knowledge and obtaining some experience.
Types of Navigation
There are three types of navigation: natural, instrument and practical. Natural navigation is what most divers try to practice on every dive by using underwater landmarks, geological features and other man-made or naturally occurring references on the bottom. Instrument, or compass, navigation entails following your compass closely throughout the course of your dive. Instrument navigation can make a dive tedious if the whole dive is spent focused on the compass. Practical navigation is a hybrid, combining attributes of the other two types into something more useful than either one by itself. Using practical navigation, divers will take directional and distance cues from the terrain surrounding them and couple that with spot checks of the compass to formulate a complete mental picture of the site they are diving.
The Compass
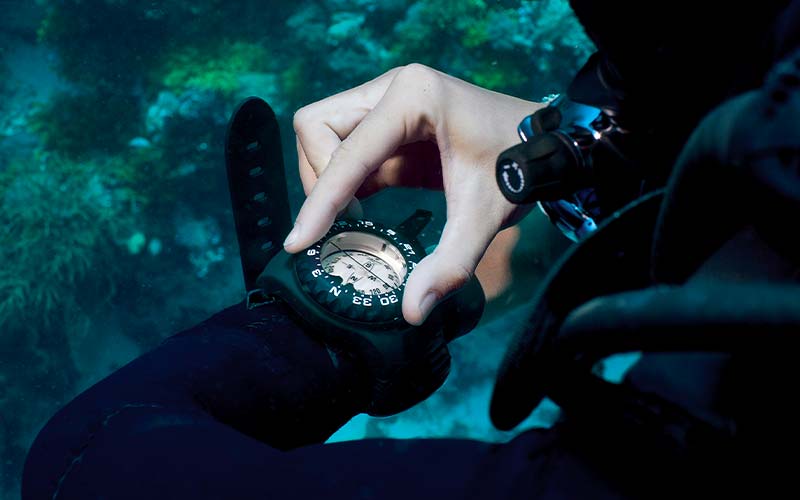
Instrument navigation is the most accurate type if done properly. The primary navigational instrument of divers is the magnetic compass: a device consisting of a fluid-filled housing containing a rotating disk called the compass card, which is visible under a clear lens. The card displays numeric markings that reflect the 360 degrees of a circle, and it contains a small magnet that seeks magnetic north — the northern extreme of the earth’s magnetic field. This magnet is positioned at an arrow, so the arrow always points north. Magnetic north is different from true north, and although this must be accounted for in long-distance navigation, it is not a concern for divers who operate within the small geographic areas of recreational dives. The lens of a compass contains a red or black line called the lubber line, which allows the diver to select and maintain a direction of travel. On most compasses the lens is surrounded by a rotating bezel that is also marked with the degrees of a circle and has two, large index marks at 0° and 180°.
To use a compass most effectively, the diver should point the lubber line in the direction he intends to travel and read the number at the bottom of the compass. This number is the magnetic heading in which the diver will travel. The compass must be held level, since tilting it will cause the card to hit the compass’ sides, preventing it from turning freely. The compass must also be pointed directly forward, in a straight line between the diver and his destination. Make sure no metal objects are near the compass as these can attract the north-seeking arrow, skewing the compass’ reading.
Using the Bezel
While watching the small lens at the base of the compass and ensuring the desired numerical heading stays in the window, the diver should swim straight in the direction the compass is pointing. This is fairly hard; another, potentially easier, method is to use the index marks on the bezel to establish a quick reference. This is done by pointing the compass in the direction of travel, then rotating the bezel until its 0° index mark is lined up directly over the north-seeking arrow on the compass card. Now the diver can swim along in the proper direction and periodically check to ensure the north-seeking arrow is still aligned with the index mark. This quick reference method is generally much easier than trying to hold the compass at eye level to sight the heading while keeping the compass level and swimming in the direction it is pointing.
The bezel can also be used to quickly and easily plot a return course. If the diver simply turns his body until the north-seeking arrow lines up with the bezel’s other index mark (the 180° mark), he will turn 180 degrees, facing in exactly the opposite direction in which he was swimming. It is important that the diver rotates his whole body and not the bezel or the compass. Of course, it’s also possible to set a course in the opposite direction by calculating a new heading: Add 180° to the original heading if it is less than 180°, or subtract 180° if the original heading is equal to or greater than 180°.
Judging the Distance
Accurate navigation also relies on the ability to correctly judge distance. The best way to do this is to time your swimming pace or count your fin cycles. A single fin cycle is completed every time the left foot kicks downward. Determine how many cycles it takes you to swim a fixed distance such as 100 feet. Use a line that is precisely 100 feet in length and lay it straight along the bottom. Swim the length of the line using your normal swim pace and count each fin cycle. Repeat the swim four or five times and average the different counts. Note that your pace at depth is likely different from your pace on the surface.
Practice, Practice

You need lots of practice to become a good compass navigator. Dry land practice is better than nothing, but to really master the art of underwater navigation you need to go diving, preferably in an area with minimal current. Practice choosing a point on the surface and trying to navigate to that point underwater. Once you have that down, try swimming back to where you started without surfacing. As a rule of thumb, a good navigator can swim 300 feet out and 300 feet back and arrive within 15 feet of where he started.
When you are ready for the big leagues, try swimming right-hand squares: Pick a heading and swim 100 feet, add 90° to the heading and swim 100 more feet in the new direction. Repeat this process twice more, and you should arrive back where you started. If you get a number higher than 360° at any point in your calculations, simply subtract 360° to get the heading you should use. To complete a left square, use the same procedure, but subtract 90° at each turn. If you really want to go for mastery, try swimming triangles by adding or subtracting 120° at each turn. Although you will probably never enjoy doing every dive while watching nothing but your compass, these skills provide an excellent foundation for practical navigation.
Practical Navigation
As divers, our primary navigational goals are finding some special point of interest during the dive and finding the boat or exit point at the end of the dive. Points of interest are easy because you can navigate directly to them if you know where they are and you have good instrument navigation skills. Finding the exit point, however, can be quite difficult, even for experienced divers. Since most of us usually exit the water at the same point we entered, it is a good habit to identify a prominent bottom feature near you as soon as you descend. Then look for some of the natural navigational clues that are present on nearly every dive site. Sites near beaches, for example, will typically have ripples in the sand that are parallel to the shoreline. On sites where there is a predominant direction of current flow, there are usually depressions in the sand upcurrent of solid objects and mounds of sand downcurrent. Cues such as these can keep you swimming in the right general direction and help bring you back to where you started. For example, to swim out and back perpendicular to the beach you only need to swim perpendicular to those ripples in the sand.
Reef lines, debris fields from wrecks and other physical structures can also be used to navigate but should be used with caution. These features do not always proceed in uniform directions, and if there are multiple structures it is easy to get off course. However, if you note your initial direction of travel with your compass and note the time, you will be able to use your compass in addition to these physical cues to help get you back to your starting point. If you start swimming north, and after five minutes you turn 90° to the left at the huge brain coral and then swim another seven minutes, you can return to the boat by reversing your direction, swimming about six or seven minutes and looking for the brain coral where you will turn 90° to the right and swim five minutes back to the boat.
Just as diving experience teaches us to enjoy being underwater without fixating on our gauges, navigation experience teaches us to find our way around without keeping our eyes permanently glued to our compasses. By spot checking the compass when you make your usual gas, depth and time checks, you will look like an expert by arriving back at the boat every time without the hazards of surfacing repeatedly to see where you are.
© Alert Diver — Q1 Winter 2012