Sometimes I feel like underwater photography is the same half-dozen techniques replicated repeatedly with different subjects. After all, we are restricted by the density and color filtration of the water, forced by physics to get close to our subjects and typically light them with strobes. Sometimes it feels like a modification of the old cliché: “f/8 and be there, so long as you are three feet or less from your subject and use a strobe.”
Yet there are those who are eager to take some chances and invest significant time into developing new techniques and hardware to achieve a new vision of what underwater photography can be. Here we present the successful experiments of three such innovators.
—Stephen Frink
Supermacro
Text and photos by Berkley White
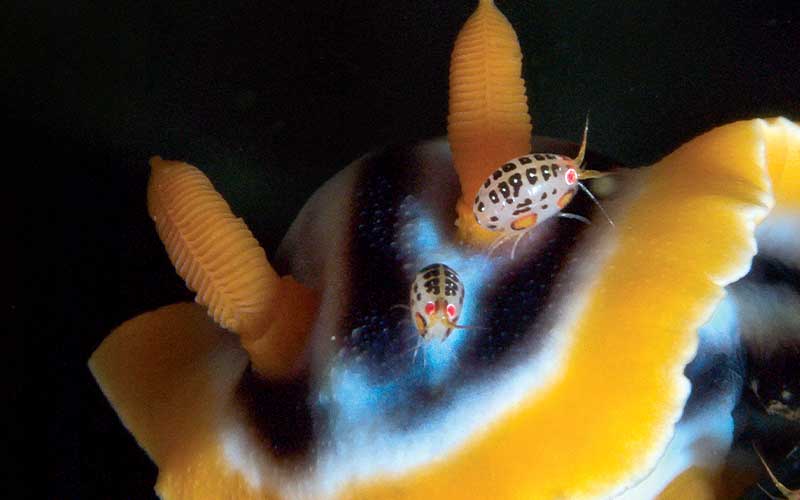
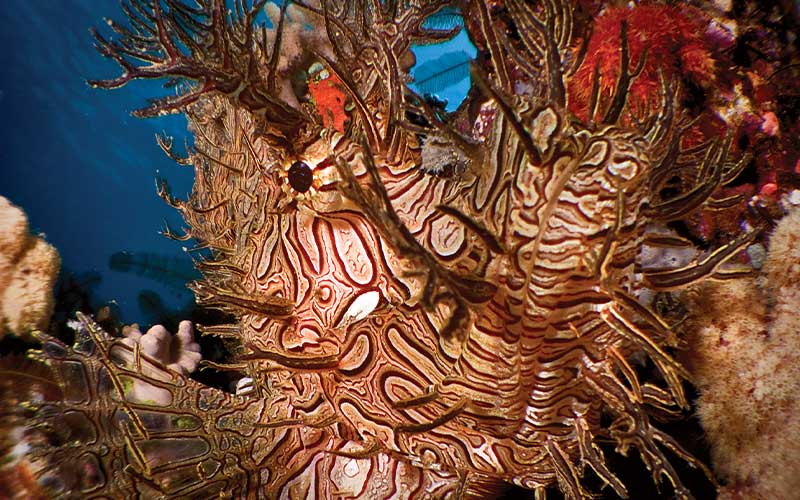
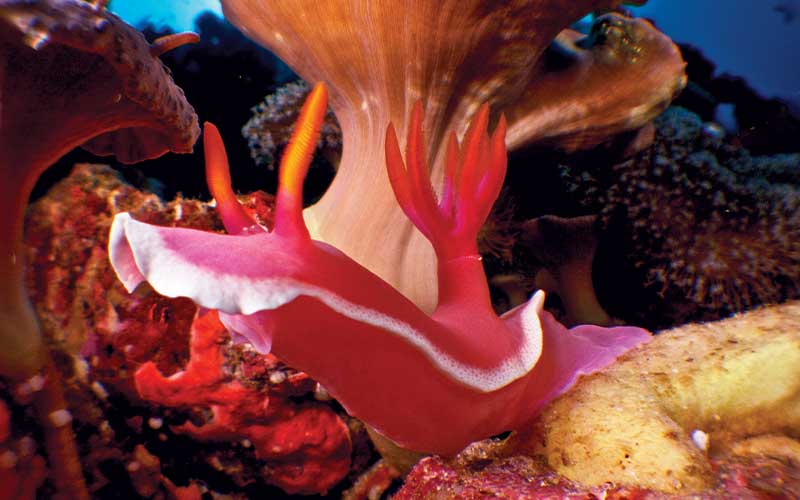
Like bug-bitten entomologists crawling the shadows of a remote rain forest, underwater photographers seem possessed with the pursuit of tiny reef creatures. Hidden in reef cracks or sitting in plain mucky sight, these critters are so bizarre and inspiring that we’ll spend our precious vacation time and hard-earned funds just to be a firsthand witness to their creepy beauty. Most underwater photographers start out with basic macro lenses and are thrilled to get a reasonably well-exposed and identifiable mug shot of a small animal. If you’ve found yourself shooting the usual suspects again and again and are looking for new inspiration, it’s time to check out the wonderful world of supermacro.
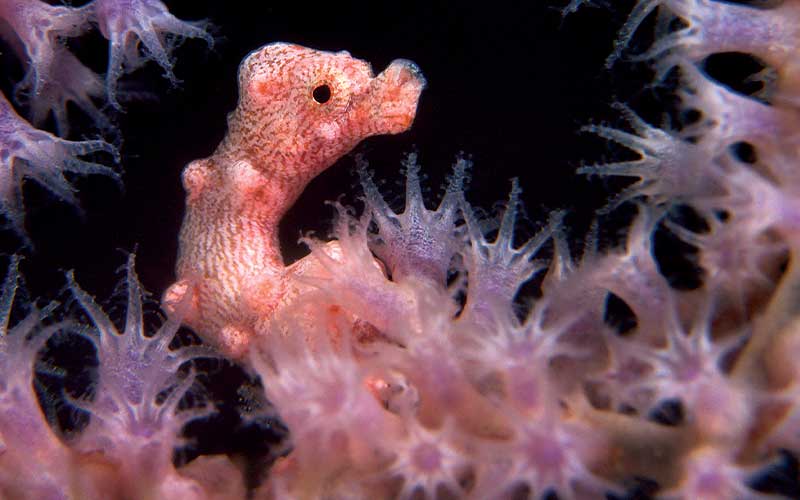
Supermacro lenses give you the ability to turn mug shots into unique critter portraits by cropping out distracting backgrounds of reef and other muck and thus allowing the viewer’s eye to focus on the cryptic beauty of the subject. You have three options:
• Least expensive: internal lens-mounted diopters
For best sharpness, choose an “achromat”-type diopter in a +3 or greater power. This diopter will allow you to get closer to subjects, but once it’s installed inside your camera housing, you can’t remove it on the dive. You’ll be dedicated to supermacro for the duration. Most SLR (single-lens reflex) and some point-and-shoot cameras feature filter threads on the front of the lens. Just make sure your underwater housing’s port has adequate internal space (or add an extension ring).
• Most flexible: underwater removable lenses
My favorite macro system is an underwater flip macro lens attached to the outside of a camera housing. An external flip lens allows you to flip a lens down for supermacro or flip it up for normal macro. It’s a mid-priced solution, but with significant flexibility. Lenses in this category, also known as “wet diopter,” have a range in price and sharpness. In my opinion, flip solutions like the Macromate (by my company, Backscatter) offer the best in image quality without the finger fumbling and the requirement of a BC storage pocket.
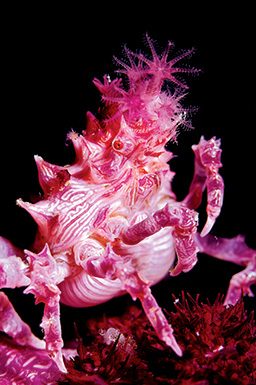
With this configuration you can shoot nickel-sized subjects; simply flip up the lens to return to normal basketball-sized subjects. Regardless of the design, if you don’t know what to expect on a dive, this type of removable supermacro is most versatile.
• Most magnification: teleconverters and underwater removable lenses
Once you’ve tasted the supermacro “Kool-Aid,” you might want to take it a few steps beyond. The two options above both require you to get physically closer to an often skittish subject. However, if you’re shooting an SLR camera, you can add a teleconverter to your lens to increase your magnification without actually getting closer to your subject. A teleconverter is a magnifying optic that mounts between your macro lens and your camera body. You can’t remove it underwater, but it will give you 1.4 to 2 times the close-up ability of your native lens.
If you’re a supermacro fan, you can add the above-mentioned underwater removable lenses to this internal teleconverter for the ultimate in semi-long-distance supermacro.
Berkley White is the founder of Backscatter Underwater Video and Photo, an underwater imaging equipment distributor with locations on the East and West Coasts of the United States. Backscatter participates extensively in educational seminars and tours relating to underwater photography.
Working with Filters
Text and photos by Alex Mustard
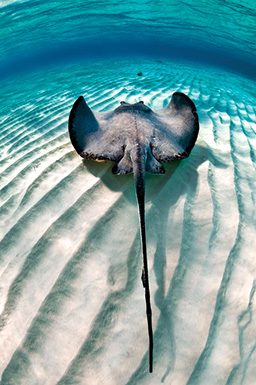
Filters are not new to underwater photography, but they have definitely come of age with digital technology. Underwater, where we have to deal with much bigger color shifts as a function of depth, filter photography benefits greatly from the adjustable white balance of digital cameras. I see filters as an alternative to shooting with strobes, not as a replacement. Like the other techniques here, they are about adding another tool to your arsenal, providing the chance to take a different type of image and diversify your portfolio.
The key to shooting successfully with filters is to appreciate that the method is completely different from shooting wide-angle with strobes. With filters, the golden rule is always to shoot with the sun on your back, so it comes over your shoulder and illuminates the subject. The direction of light must be your first thought before every shot!
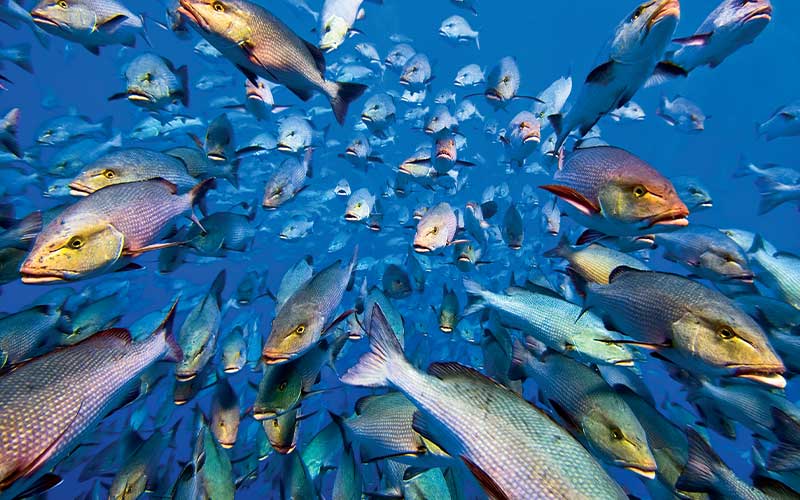
Filter photography adds color to images in a different way than shooting with strobes, and many of the most memorable filter images are ones that are impossible to replicate with strobes. One of the most obvious differences in filter images is that color penetrates deeply into the shot, making filters ideal for reef scenes stretching away from the lens or a school of fish coming toward it.
The best subjects for filters are coral gardens, divers, wrecks, big pelagics and schools of fish. Filters work best on sunny days when there is plenty of light, although if your camera has impressively high ISO capability, they can even be used in darker conditions in cold waters.
No underwater filter can work at all depths because the filtering effect of seawater increases rapidly as we descend. This was the philosophy behind the Magic Filter when I developed it, to create a filter that worked with the camera’s manual white balance to give as wide an operating window as possible, ideally when shallower than 50 feet, although you can push this a little deeper with the “architectural” nature of shipwrecks.
Enlightened filter use requires us to set the camera’s white balance manually. This can be done using a dive slate, gray card or even the reef as a white balance target at the same depth as the subject. When setting white balance, it is essential that the target is not in shadow and is correctly exposed.
If you shoot JPEGs, then the white balance must be set each time you photograph a subject at a new depth. With raw, it is still important to set the white balance underwater, but you can fine-tune to a far greater extent in the raw converter. This is not to say you can be too casual about white balance for specific depth and light conditions. Large color shifts, even in raw conversion, can generate noise and upset the exposure of certain colors.
Aside from being able to generate a unique vision, there is the hidden pleasure of filter photography: Leave your strobes on the boat, and enjoy the freedom of an exceedingly maneuverable and compact rig. Not to mention, there is no need to wait for the strobe to recycle!
Trained as a marine biologist, Alex Mustard, Ph.D., is a highly acclaimed underwater photographer and a very prolific educator, inventor and author. He has published extensively on the art and science of underwater digital imaging.
Underwater Endoscope
Text and photos by Eric Cheng
Wide-angle lenses are typically used by underwater photographers to capture images of sweeping reef scenics and large animals. Macro lenses are used to photograph life at a much smaller scale. But single, macro photography lenses that tell a story are rare because normal macro lenses are too long to capture both a macro subject and the environment simultaneously.
Over the past few years, I’ve noticed more and more underwater photographers trying to use super-wide lenses like full-frame fisheyes to photograph smaller and smaller animals. These fruitless wide-angle macro shots are attempts to capture compelling animal portraits while simultaneously showing the environment in which the animal lives. Taken to the extreme, wide-angle macro photography requires specialized equipment: underwater endoscopes.
As interesting as underwater endoscope photography sounds, it is not new. Photographers and cameramen tied to organizations such as National Geographic and the BBC have been using endoscope-like systems for years, both above and underwater. However, with the production of a brand-new lens with a tongue-twisting name, the INON UFL-MR130 EFS60 Underwater Micro Semi-Fisheye Relay Lens (hereafter referred to as the “insect eye”), the mass market for the first time can purchase an underwater endoscope. INON’s insect-eye lens is a tiny, 130mm fisheye lens located at the end of a long, 18-inch port filled with the numerous elements necessary to make such bizarre optics work.
Wielding an INON insect-eye lens, I am suddenly able to see scenes from the perspective of small critters. Because the lens diameter is so small, I am now able to photograph tiny animals from their point of view, and, because the lens is long and thin, I can insert it delicately under the canopy of corals to photograph small animals in their native environment. An entirely new world has suddenly been opened to photographic exploration.
A typical insect-eye subject is only a half inch to 6 inches away from the end of the lens; any further and the subject becomes too small in the frame. Shooting technique is extremely tricky because the insect eye works only at very small apertures (typically f/16 or smaller), which allow for a sharp image and large depth of field (so both foreground and background elements are sharp). Manual focus is unwieldy and difficult, and small apertures mean that a lot of light is necessary for a proper exposure.
Strobe lights are very effective at the small distances we are working with, but exposing for a nice background blue starts to become difficult. A typical setting for a shot 30 feet down on the reef might be 1/15 second at f/22, ISO 400. That’s fine if both subject and photographer are stationary, but it is much more difficult if the photographer is being thrown around in the surge without a handhold. Given the difficulty of this sort of photography, I come back from shooting sessions with the fewest keepers of any photographic scenario I’ve experienced. It can be extremely frustrating to miss so many shots, but the images that I do end up keeping can be truly magical.
These images were taken with a Canon EOS 50D digital SLR in an INON X2 underwater housing — the only combination that was compatible with the insect-eye lens when I took these shots in December 2009. Since then, various manufacturers have created adapters to support other housing brands. I suspect that we will soon begin to see spectacular results from underwater photographers experimenting with insect-eye lenses in the field.
Eric Cheng is among the most influential forces in digital underwater imaging. Cheng is the founder of www.wetpixel.com, the preeminent online reference for underwater photography. A creative and skilled shooter, Cheng is frequently on the road to exotic dive destinations, expanding his extensive portfolio.
© Alert Diver — Q2 Spring 2010