Whether you’re taking a 23-hour flight to Malaysia or a 23-minute drive to the shore, all diving involves some form of travel. For this reason, DAN recognizes travel safety as a key aspect of our mission. This Smart Guide is a quick and easy reference tool to help you prepare for your dive travel to local and international destinations.
The following packing checklist is not comprehensive. It is intended to provide a foundation to make it easier for you to customize according to the specific details of your trip. Copy, scan, or retype and customize this list, adding in any specialized equipment you need, as well as your clothing, toiletries, and other personal items necessary for your trip.
Essentials
Certification card (C-card)
DAN membership card
Hat
Nutritious snacks
Sunscreen
Water
_________________________
_________________________
Gear
BC/BCD
Booties/fins
Cutting tool or dive knife
Dive computer
Exposure suit
Gear bag
Gloves
Hood
Lights
Mask
Reels
Regulator
Snorkel
Surface signal
Tank(s)
Weight
Whistle
_________________________
_________________________
Specialized equipment (optional)
Camera and other photography equipment
Diver propulsion vehicle (DPV)
Oxygen unit
Rebreather
Speargun
_________________________
_________________________
“Save-a-dive” kit
Batteries
Clasps
Defogger spray
Duct tape and waterproof adhesive/sealant
Fin buckles and straps
Lighter
Mask strap or extra mask
Multi-tool (including an adjustable wrench and hex key)
O-ring kit (including O-rings for high- and low-pressure hoses, an O-ring pick and silicone grease)
One of the benefits of domestic travel is that it can be more spontaneous and cost efficient than international travel. Knowing how to get and stay prepared for even a short ride to the nearest coast, lake, or quarry can help make your local trips easier, safer and more enjoyable.
Get Prepared:
Create a packing checklist based on your typical dives.
Maintain your gear so you can grab it and go.
Assemble a first-aid kit and a save-a-dive kit.
Keep your relevant certifications up to date.
Before You Hit The Road:
Research the weather, currents, and water temperatures at your destination.
Customize your packing checklist for this specific trip.
Check — and if necessary replenish — your first-aid kit.
Tell someone where you are going.
Remember to bring plenty of water and healthy snacks.
International Travel
2 Months Before Travel:
Be sure your passport is valid at least six months following your last intended date of travel.
Determine whether you need a tourist visa.
Find out whether you need any vaccinations.
Complete RSTC medical form and have copy of physician sign off if needed.
Decide whether you want to apply for Global Entry.
1 Month Before Travel:
Check your destination country’s laws about your prescription medications.
Acquire local currency and talk to your bank about international ATM arrangements.
Find out if there are foreign transaction fees associated with your credit cards.
Enroll in the Smart Traveler Enrollment Program (STEP), which connects you with the nearest U.S. Embassy or Consulate.
2 Weeks Before Travel:
Customize your packing checklist.
Set up a global calling plan.
Inform your credit card companies of your intention to travel abroad.
Make sure you have purchased or renewed your travel insurance.
1 Week Before Travel:
Make two copies each of your passport (color copies are preferred), driver’s license, credit cards, itinerary, lodging confirmation and visa (if you need one). Leave one set of copies with someone at home, and pack the second set someplace separate from the original documents.
Contact your post office to request that they hold your mail while you’re away.
Pack everything you won’t need before your trip.
24 Hours Before Travel:
Check in to your flight, and make sure you have a seat assignment.
Run back through your packing list again, and make a copy to help you pack for the return trip (so you won’t forget your toiletries, chargers, medications, etc.).
Notify someone of your travel plans.
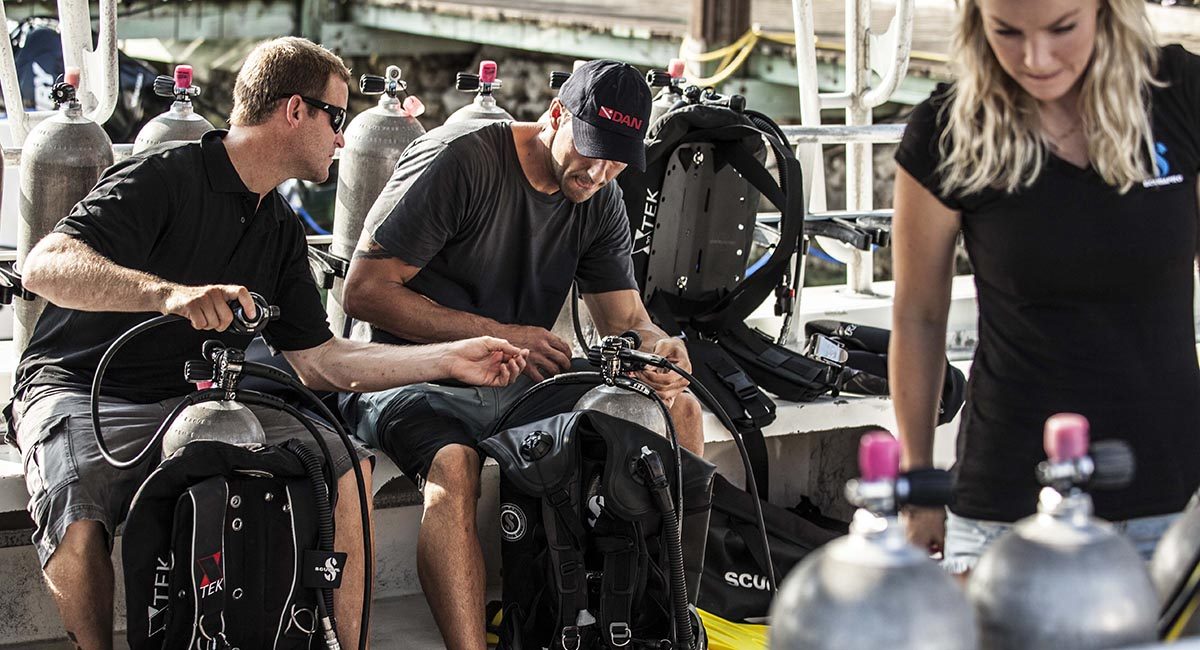
Air Travel With Gear
Looking forward to invigorating days of diving is sometimes the only way to get through the headache of traveling with dive gear, which can be clumsy, cumbersome, and difficult to explain to airport security. Use the following guidelines to streamline the process.
Check Before You Check
If you’re planning to bring your gear with you, think about what you have to check and what you should bring in your carry-on to make sure you can dive immediately even if your bags don’t make it. Remember also to research your airline and destination country’s baggage allowances.
Carry On
Regulator
Dive Computer
Mask
Swimsuit
Carry On or Check
BC/BCD
Fins
Snorkel
Check Only
Cutting Tools
Spearguns
Cylinders*
* When traveling with cylinders, make sure to remove the valves.
Rental Gear
If you choose to forgo the hassle of traveling with your gear, find a dive operator that offers gear rentals. The quality of rental gear varies, so make sure you thoroughly research the dive shops at your destination. If you do choose to rent gear at your destination, you’ll still want to bring a few items.
Items widely available for renting
Regulator
Dive Computer
Mask
Swimsuit
Items that may or may not be available for renting
Masks
Snorkels
Fins
Specialty items to consider renting
Cutting Tools
Surface marker buoys
Light
Dive Site Regulations
Depending where you dive, rules differ. The site can regulate everything from what gear you can use to what hours you can dive. Before you go, ask these questions:
Does my training match dive site requirements?
Not all dive sites allow open water recreational divers. In fact, some dive sites — such as cavern and cave diving sites — require a high level of training. Make sure you either check online or call the local dive operator to determine certification and training requirements.
What equipment is allowed?
Some sites require you to bring special equipment such as surface marker buoys or spare air. Other locations prohibit use of certain items such as diving gloves or spearguns to protect the marine environment. Learn what is necessary and what is restricted before you pack.
What are the site’s access requirements?
Protected dive sites or sites located next to private property may require you to purchase a ticket or tag to dive. You may also find out that entry is limited to specific locations. Don’t show up to a site only to be turned away. Do your research.
Good diving etiquette dictates that divers should follow the rules set in place no matter where in the world they travel. Remember that diving regulations are in place to protect your safety, the safety of the marine environment, and the local customs and laws of your travel destination.
Most divers are accustomed to thinking about maintaining fitness to dive, avoiding the bends and minimizing the risks of marine life injuries. But all divers are also travelers and should be aware of travel-related medical conditions.
Dehydration
What is it? Depletion of water and other bodily fluids. Can impair body’s ability to carry out normal functions.
Why does it affect travelers? Whether traveling by car, bus, train, air, or boat, you may lack convenient access to drinking water. Air travel is particularly dehydrating because the air on planes is very dry.
What to do: Prevent dehydration by bringing one or two bottles of water in your carry-on. While traveling, check your urine. If it is dark, drink some fluids right away. If you notice extreme thirst, lack of urination, withered skin, dizziness, or confusion, refrain from diving and seek immediate medical care.
Deep Vein Thrombosis (DVT)
What is it? When blood clots form in the body’s deep veins, usually in the legs. Can lead to life-threatening conditions such as pulmonary embolism or stroke.
Why does it affect travelers? Long periods of inactivity inhibit normal blood circulation.
What to do: Whether you’re driving or flying, make sure to get up and stretch your legs from time to time. If you know you are at increased risk for DVT, wear compression socks and consult with your doctor about taking clot-preventatives. See DAN’s online Health & Diving library for more information.
Foodborne Illness
What is it? When food incubates bacteria, transmits disease from person to person or animal to human, or carries other toxins (as with poisonous fish). Can be fatal or cause life-threatening symptoms in extreme cases.
Why does it affect travelers? According to the CDC, travelers’ diarrhea is the most common illness affecting travelers and may occur in up to 50 percent of international travelers. It often results from consuming improperly handled food or untreated water.
What to do: Avoid raw or undercooked meat and seafood as well as raw fruits and vegetables, untreated water and ice cubes, and any food you suspect may have been prepared in unhygienic conditions.
Vector-Based Diseases
What are they? Illnesses transmitted by mosquitoes, ticks, fleas, and other insects. These diseases include chikungunya, dengue fever, malaria, and others.
Why do they affect travelers? They don’t affect travelers per se, but rather are endemic to certain areas of the world.
What to do: Find out whether your travel destination carries a risk for vector-borne disease and take appropriate precautions, which may include vaccination, insect repellant, or avoiding certain behaviors or environments.
QUICK TIP: Research any endemic diseases or special conditions to which you may be exposed, especially if you plan to travel internationally. These can range from malaria to heat stroke. The Centers for Disease Control and Prevention (CDC.gov) is a great resource for comprehensive information on current alerts and common diseases in your destination.
Flying After Diving
Flying to a destination near sea level before diving poses virtually no risk. Flying after diving, however, increases decompression stress, since the pressure in an aircraft cabin is lower than ground-level atmospheric pressure. DAN recommends you follow these guidelines when traveling:
Dive Profile
Minimum Preflight Surface Interval Suggestion
Single no-decompression dive
12 hours or more
Multiple dives in a day
18 hours or more
Multiple days of diving
18 hours or more
Dives requiring decompression stops
Longer than 18 hours
Please remember that any postdive ascent to a higher altitude – even using ground transportation – increases your decompression stress.
Bring DAN With You
DAN is here for you 24 hours a day, every day, anywhere in the world. If you need non-emergency medical information or assistance, visit DAN.org or call the medical information line at +1 (919) 684-2948 during normal business hours. In the event of an emergency, here’s what you should know before you call:
Contact local emergency medical services (EMS) immediately. After EMS is activated, call DAN for additional assistance.
The emergency number on the back of your DAN card (+1-919-684-9111) accepts direct and collect calls, but countries vary in how to make collect calls. To make a collect call from within the United States, replace the country code with a 0. When traveling outside of the United States, research that country’s collect calling protocol and EMS numbers prior to departure.
When you call, you’ll need to provide the following information:
Your name
The name of the injured person
Your location
A call-back number
A description of the emergency
Names of prescription medications you are currently taking
Any pre-existing health issues or concerns
The DAN Emergency Hotline also serves as your resource for activating DAN’s TravelAssist benefits, including medical evacuation.
STEP 1. Call DAN’s Non-Emergency Medical Information Line (+1-919-684-2948)
QUICK TIP:
Whether you’re traveling domestically or internationally, research the availability and location of emergency medical services at your destination. Adjust your dive plan accordingly and have a realistic emergency action plan.
As divers, we’re all familiar with the demands of traveling with dive gear. Luckily, routine maintenance and careful storage of gear can not only make your diving safer, but it can make your trip planning easier. The following guidelines will help you make sure your gear is ready to go when you are:
Item(s)
Before you Dive
After you Dive
Storage
Professional Servicing
Mask, snorkel and fins
Keep well organized to minimize the risk of their being kicked, stepped on or tripped over.
Rinse and dry well.
Pack and store carefully so they’re not crushed by the heavier gear.
Not applicable.
BC/BCD
Test before you dive.
Rinse the outside and flush the bladder with fresh water. Hang to dry.
After drying, partially inflate jacket for storage.
Have professionally inspected annually; remember the low pressure hose and dump valve.
Regulator
Test function as soon as you set up your gear.
Rinse and clean while still connected to cylinder and pressurized. Leave out to dry.
Keep dust cap in place and secured. Store in a regulator bag.
Service at least once a year.
Wetsuit, boots, gloves and hood
If necessary, lubricate zippers.
Rinse, turn inside out, and hang to dry. If wetsuit has an unpleasant odor, use wetsuit shampoo in postdive rinse.
Store in the shade, as neoprene is susceptible to UV damage.
Not applicable.
Dive computer
Check battery icon.
Rinse and dry.
Store in a dry, cool, ventilated area.
Service every one to two years, or per the manufacturer’s recommendation.
Cylinder
Handle with extreme care, as a pressurized cylinder presents a risk of explosion. Secure tightly for transportation.
Rinse thoroughly and let dry. Regularly remove tank boot to prevent a buildup of salt and debris.
Never drain completely of gas. Reduce pressure to the lowest reading on the pressure gauge. Keep a dry dust cap on cylinder valve.
Few people enjoy perfect health for their entire lives. Adopting a healthy lifestyle early in life can help postpone ailments associated with aging.
When health issues present, it’s important to discuss them with your healthcare provider, pursue appropriate interventions and adopt modifications. With ongoing awareness of your personal health status and timely adjustments to maintain your health, diving can be a lifelong recreational activity.
Prior to diving, you should take an honest assessment of whether you are medically fit to dive. Be vigilant for signs of acute illness (like congestion) and familiarize yourself with the risks and essential precautions associated with any chronic diseases.
Acute illness that lasts more than a few days or leaves you feeling exhausted should prompt a delay to diving.
Do not dive when ill.
Wait until you regain your normal strength and stamina.
If you are not ready to exercise at your pre-illness level, you should postpone your dive.
The best course of action is to consult with your physician.
Chronic diseases may affect your fitness to dive risks even if you perform well in other activities.
Some health conditions, especially in advanced stages, may make the risks to you and your dive buddies unacceptably high.
In less advanced or more stable medical conditions, divers may continue safe and enjoyable diving with proper guidance from their physician, medical controls and wise choices.
During your annual physical exam or following any changes in your health status, consult your physician to ensure you have a medical clearance to dive.
If you have questions or want to find a doctor near you who is familiar with diving medicine, email .
Fitness
Being a physically fit diver means that you have sufficient aerobic capacity, cardiovascular health and physical strength to meet the demands of the diving environment. Can you fight a current? Perform a long surface swim? Help a buddy in an emergency? All divers need to be physically able to perform these essential tasks.
Here are some tips to help you enhance your fitness for diving:
While diving itself can be physically demanding, it is not enough to maintain fitness overall. Divers must stay fit with additional activities outside of diving, such as swimming laps, strength training and flexibility and balance exercises.
Regular physical activity, including aerobic activity and muscle-strengthening activity, is essential to maintain physical fitness.
If you are over 40 and do not exercise regularly, consult your physician before you start exercising.
Review the physical activity guidelines published by the U.S. Department of Health and Human Services on Health.gov.
Divers should dedicate time to fin swimming. Fitness for swimming against a current includes fin-swimming skills. Divers without these skills may not be able to create sufficient propulsion to overcome a strong current even if they have high aerobic capacity for muscular work.
At least six weeks prior to a dive trip, gradually increase the level of your physical activities.
Join your local dive club for more specific training opportunities.
Visit AlertDiver.com/DiveFitness to find fitness routines tailored for divers.
To avoid an increased risk of decompression sickness, DAN recommends avoiding strenuous exercise for 24 hours after diving.
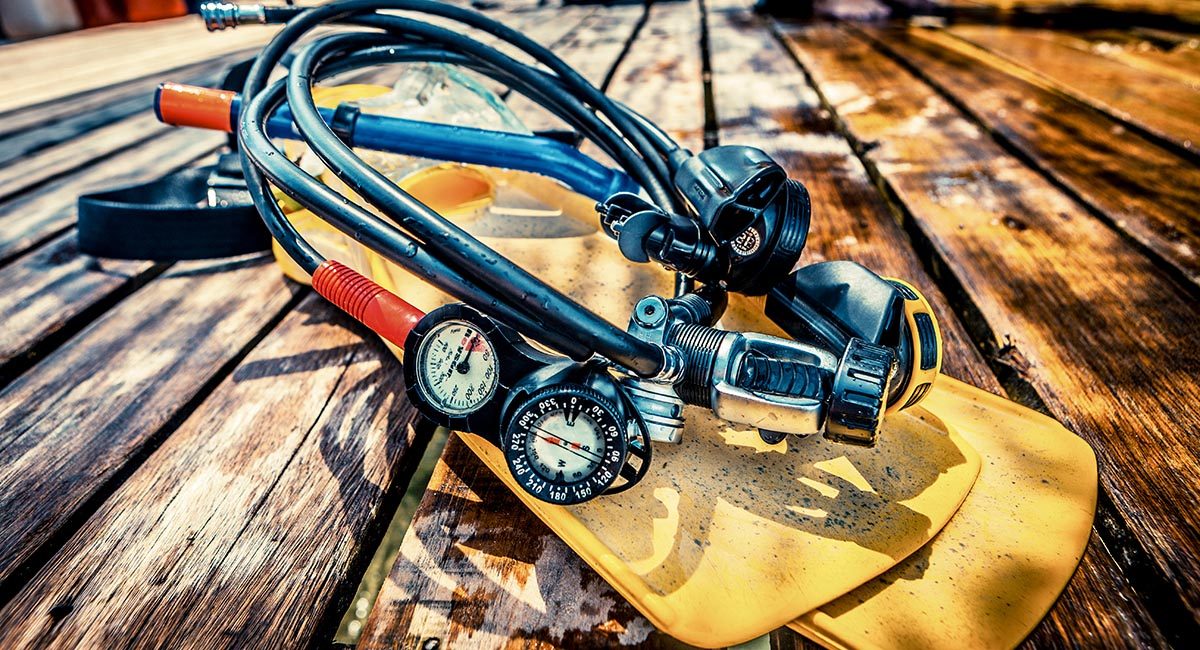
Dive equipment is life-support equipment. Each time you dive, you are venturing into a fascinating, but also unforgiving environment; make sure you are diving with a set of properly functioning equipment.
Rinse your equipment after each dive and clean it after each trip before storage.
After rinsing, allow gear to dry completely in a cool, shady and well-ventilated area before you put it away.
Store your gear in an area that is protected from extreme temperatures as well as dust and dirt.
Whether you use your equipment frequently or only for annual dive trips, your gear should be professionally serviced to ensure all parts and pieces are working properly.
Regularly monitor your equipment for signs of wear and check the hoses for leaks and cracking; pay particular attention to your regulator.
As part of your annual equipment overhaul, have your pressure gauge checked for accuracy.
While most divers are diligent about their regulators, the BCD is often overlooked. The bladder and low-pressure inflator hose are both subject to deterioration and should be inspected at the same time the regulator is serviced.
Replacing parts as needed prolongs the usability of your equipment and helps prevent incidents like uncontrolled ascents and regulator failure underwater.
Follow your manufacturer’s guidelines on the proper maintenance of your equipment. If you have questions, check with your local dive center or ask the equipment manufacturer.
Take an equipment maintenance course for more information on gear maintenance.
One of the most important predive steps is dive planning. Learn as much as possible in advance about any dive site you plan to dive.
Before you even head out to a site, make sure to investigate currents, depths, marine life, entry and exit points, surfacing techniques, boat traffic, environmental health concerns, etc.
Check out what surface support you may need and what local laws or regulations may apply to your planned diving activity.
Inform someone who is not coming on your trip what your dive plan is and when you expect to be back.
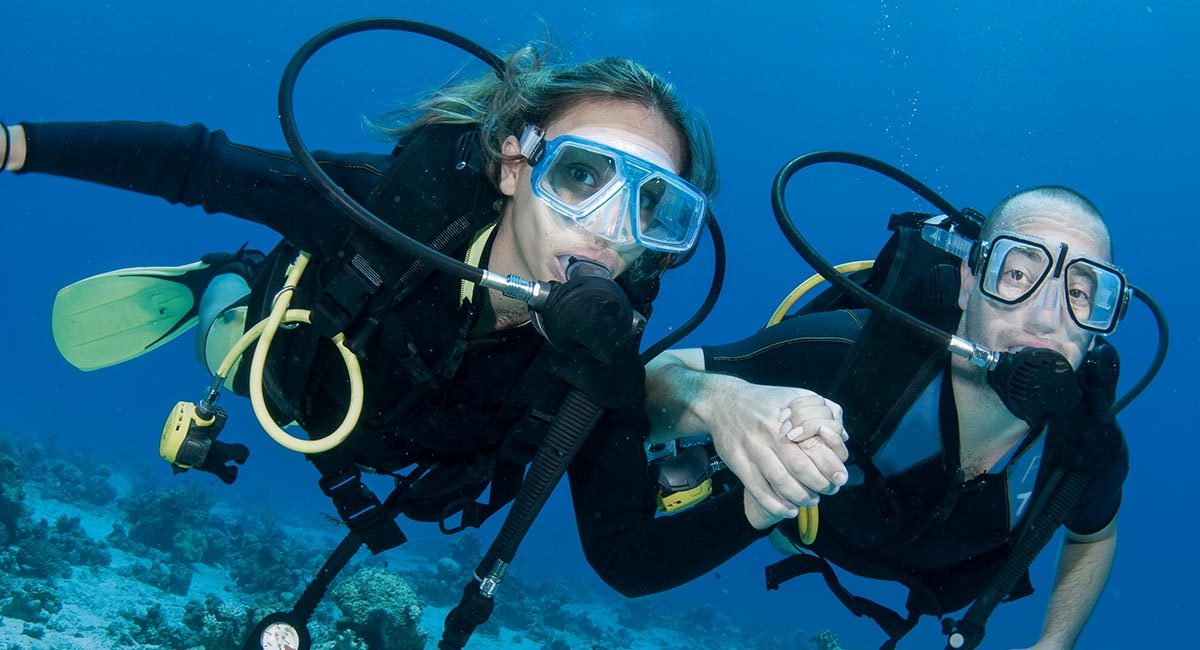
Prior to your dive, make sure you and your buddy are on the same dive plan. Discuss contingencies should conditions change during your dive. Establish the maximum depth, maximum bottom time and minimum air supply to terminate the dive.
Review what you and your buddy would do if you were to become separated, exceed your planned dive or experience an out-of-air emergency or an equipment issue underwater. Having these discussions on the surface helps you prepare as a buddy team to manage any situations that may arise while underwater.
Review hand signals with your buddy.
Conduct a predive test on all of your equipment, particularly any rented gear. Use a written or mnemonic checklist to ensure you don’t overlook an essential step. Don’t skip the buddy check.
Remember to create an emergency action plan (EAP). This essential tool that divers are taught how to construct in their advanced training courses should include what prompts an emergency response, important contact information, the nearest medical facility and the best means of getting there as well as essential first aid equipment.
Dive planning doesn’t have to be complicated or inflexible, but it is essential to prevent and manage diving incidents.
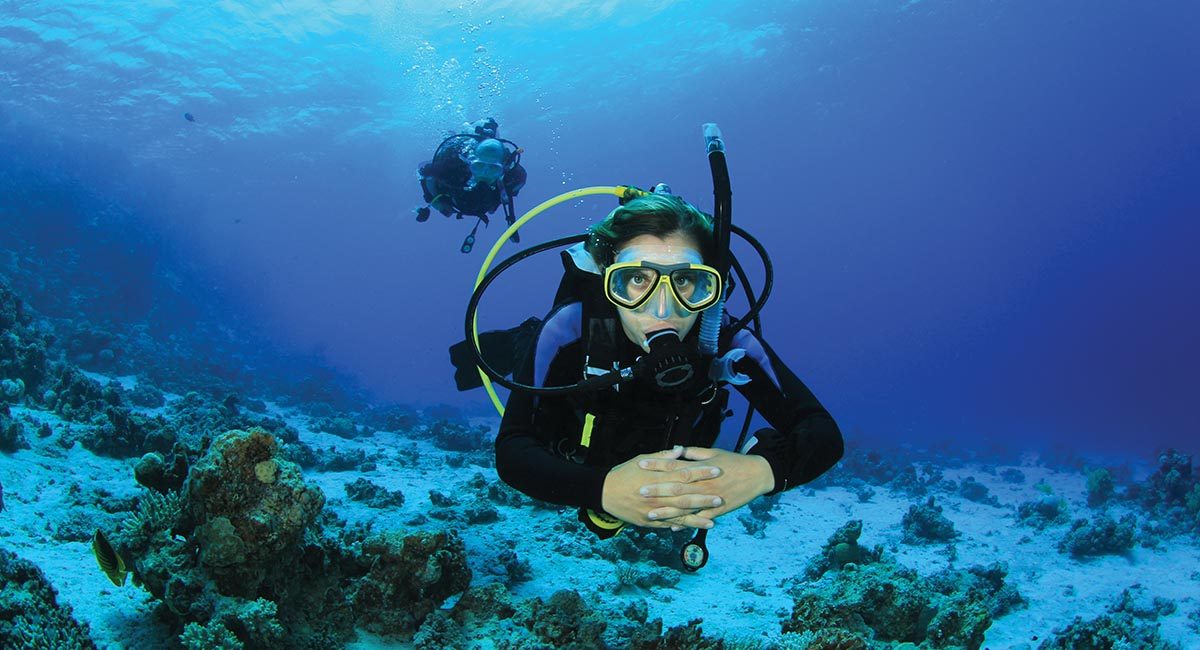
It’s not surprising that the most common injuries among divers are related to buoyancy issues—barotrauma, uncontrolled ascents, marine life injuries and more could be prevented with some practice and attention to detail.
Inefficient buoyancy control can result in descending deeper than planned, altering the intended dive profile and potentially increasing air consumption. Constant adjustments to your buoyancy control device can also affect air consumption.
The worst case scenario is an uncontrolled ascent, which places the diver at risk for a lung overexpansion injury (pulmonary barotrauma) and substantially increases the risk for an arterial gas embolism.
Ear injuries are also commonly associated with ineffective buoyancy control. During descent, if you feel uncomfortable pressure in your middle ears or sinuses, you should stop your descent, ascend until the pressure resolves, attempt to equalize and, if successful, continue to descend. If you experience a reverse block on ascent, you should descend a bit and attempt to equalize. These procedures are difficult to execute without proper buoyancy control.
Most marine life injuries result from unintentional contact between a diver and the marine life. Proper buoyancy control is essential to protect ourselves and the environment.
The physics of descending and ascending require conscious adjustment based on exposure protection, dive environment and choice of equipment.
Buoyancy Control Begins With Proper Weighting
The amount of weight you select should allow you to descend, not make you sink. Predive buoyancy tests are a crucial tool in determining proper weighting.
Calculating weight requirements: Different exposure suits, dive environments (saltwater vs. freshwater), and tank size and composition (steel vs. aluminum) require different amounts of weight to attain proper buoyancy.
Your BCD is not an elevator. Be aware of how your BCD responds to the addition or venting of small amounts of air.
And remember, buoyancy changes during the dive. On descent, your wetsuit compresses decreasing buoyancy. During the dive, as the gas in your tank is depleted, the tank becomes more buoyant. On ascent, the air in your wetsuit and BCD expands, increasing your buoyancy.
The benefits of buoyancy control are definitely worth the investment of time, maintenance, and practice to enhance your diving and to help you avoid injury.