In the past, taking macro photography beyond 1:1 — greater than life size — was difficult. Magnifying lenses (known as diopters) could be threaded to the front of a macro lens inside a housing, but then the whole dive would have to be dedicated to shooting small creatures because the diopter could not be removed underwater. Wet macro lenses, which attach to the outside of the housing, could be put on and taken off during a dive, but the level of magnification was marginal. With the introduction of apochromatic wet lenses in the past few years, however, diopters of varying strengths have managed to achieve effective magnification for high-quality images. These new tools have made supermacro photography readily available to anyone who wishes to go beyond 1:1.
A wet diopter increases magnification while decreasing the lens’ working distance. This makes a longer lens (such as a 100mm or 105mm lens) the best choice. Magnification beyond 1:1 can also be achieved with a 60mm macro lens, but this can make the working distance between the port and the subject so short that it becomes difficult to illuminate the subject with a strobe light and skittish creatures are more likely to be frightened. Using a longer macro lens will allow you to maintain a respectful distance from marine life and provide the space for a more creative approach to lighting. The most popular setup involves an external wet lens attached with a flip adapter. This configuration allows the photographer to shoot without additional magnification for larger or more nervous critters or to flip down the diopter and zero in on really small subjects.
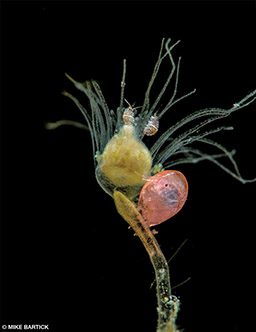
To paraphrase David Doublet, “If you can’t shoot exotic subjects, then shoot the common subjects in an exotic way.” Supermacro photography will relentlessly challenge your skills as a photographer and a diver. Even spotting supermacro subjects is challenging. Shooting supermacro will certainly deliver visual diversity and can add exotic flavor to a plain vanilla portfolio.
Ideally, the objective is to capture the images in-camera — not through creative cropping in postprocessing. This ensures the highest-resolution images and, thus, the greatest enlargement possibility for decorator prints or publication. Newer high-resolution cameras such as the Canon EOS 5DS and Nikon D810 offer huge files, and some cropping is certainly acceptable. But purity of the discipline obliges composing and capturing as close as possible to the end result.
Once you’re within the realm of supermacro, certain technical considerations must be considered. Magnifying your subject and creating supermacro images significantly affects depth of field, composition and lighting.
Depth of Field
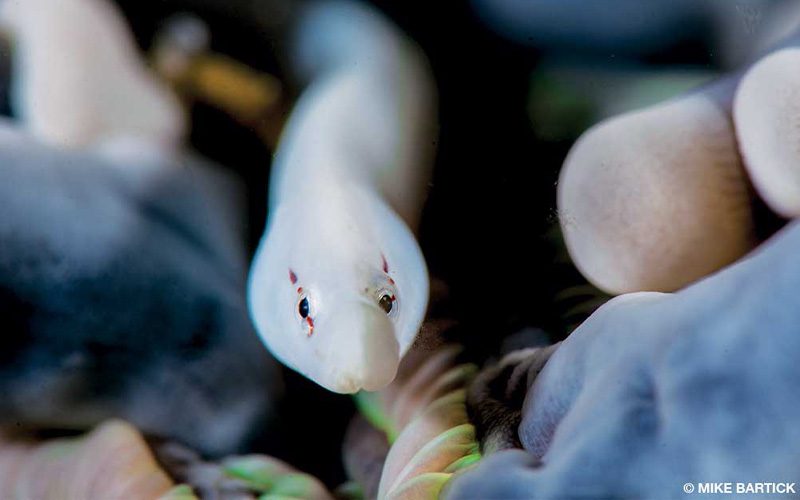
To increase DOF, most photographers begin by adjusting the aperture, or f-stop. The higher the number, the less light enters through the camera’s iris and the greater the DOF. Yet this comes at a price: Ambient light is decreased, and the background may go black. This is a nice effect at times, but not every supermacro shot benefits from a black background. The creative photographer will know how to bring more ambient light into the image via aperture or shutter speed and can thereby control how light or dark a background will appear. An aperture that’s too small can soften the image detail due to diffraction. An image may actually be sharper at f/11 than at f/32, but the DOF won’t be as great. Imagine, for example, a small moray eel. You might be able to get the sharpest detail of its eye at f/11, but if your intended composition requires both the eye and the nose to be sharp you might wish to shoot at f/32. A slight increase in ISO will also help you shoot at a higher f-stop by amplifying the incoming light. Knowledge of the science of optics will help translate the vision in your mind’s eye to the pixels in your digital camera.
Composition
Consider the fact that all lenses have a sweet spot, which is generally at the center of the lens. Not all wet diopter lenses are equal in this regard; some offer a greater area of sharp rendition. Yet no matter what lens is being used there is a way to get around a “bullseye” shot. Some compositions will benefit from the subject being centered, but others will favor the primary subject elsewhere in the frame. When autofocusing, the photographer will need to shift the autofocus indicator zone to the portion of the frame that needs the greatest sharpness. Many supermacro aficionados prefer to focus manually, perhaps taking the lens to its greatest magnification and then moving closer to the subject until the desired portion of the composition pops into clarity.
Lighting
When shooting macro and supermacro, lighting is critical to both exposure and composition. Due to the close working distances, some technical issues such as backscatter (particles suspended in the water column illuminated by the strobe) are happily minimized. This is fortunate because many supermacro subjects are found in muck or in places with poor or variable water clarity. I like to keep things simple, so in most cases I use the fastest shutter speed possible. This minimizes ambient light, but the composition is usually so tight that everything in the frame is typically strobe lit anyway. This allows me to concentrate on f-stop, strobe positioning and composition.
My strobes are usually angled so they’re not aimed directly at my subject. A modeling light separate from the strobe is extremely important for this setup. Often I use a single strobe over the subject and aim it slightly back toward my housing so most of the light is actually shadowed by my housing and port. Just a small curtain of light illuminates the subject. This strobe angle can help eliminate background light even on a shallow reef. In some cases I use a light-shaping device such as a snoot (see alertdiver.com/Unique_Techniques) to eliminate a distracting background.
Sometimes I want big and bright macro images and need a flood of light. In these cases I aim a primary strobe and use a second strobe (usually set to low power) for fill light. Backlighting with a third light can give the subject an additional layer that will set your photo apart from the pack.
Before your next dive, get to know your system a little bit. Identify and learn how to work with your camera’s weak points. Learning how to squeeze a little more horsepower out of your existing system can be as simple as experimenting. Here are a few ways I have revved up the power of my camera system through logic and experimentation.
Learn the camera’s focus-locking functions. This can be a powerful tool for split-second shooting. Once you achieve correct focus you can stop the lens and adjust the critical focus with subtle camera movement (or the subject’s movements).
Practice focusing, locking, adjusting and firing while paying close attention to critical focus. Remember that what we see through the lens and diopter is equivalent to a maximum aperture of the lens, usually f/2.8 for a macro lens on a digital single-lens reflex camera. With practice you will become accustomed to the difference between what you see through your viewfinder and what your lens and settings capture.

Any lens appears darker as the aperture decreases, for the obvious reason that less light reaches the viewfinder. To eliminate the handicap of focusing through a dark lens, modern cameras have automatic diaphragms and only step down to the preset aperture at the moment of exposure. The image’s DOF will no doubt be better than what is seen through the ground glass for the simple reason that rarely would a macro shooter expose at wide-open apertures. The precise DOF will not be revealed until later in the image review.
Visualize your sensor plane as a three-dimensional rectangular space in which your subject will be photographed. Left to right is the plane of field, and front to back is the depth of field. After locking your focus you can recompose in this space to get away from the standard bullseye composition. Getting low is also important for exposing the little critter’s habitat and getting a more intimate look into its world. Shooting anything from front to back will always create a greater fall off of acceptable sharpness in your DOF. Shooting the subject on a plane parallel to the camera’s sensor will maximize the areas of the image in sharp focus.
Good buoyancy control and sensitivity to fragile coral is of course very important with supermacro photography. It usually takes time to gradually approach cryptic and skittish creatures, and it may be tempting to kneel on the bottom when doing so. It is almost always best to dive without being in contact with the substrate and to also make sure gauges or fins don’t inadvertently come in contact with fragile coral.
Going beyond 1:1 isn’t as difficult as you might think; all it takes is a little practice, determination and a good eye for finding subjects. Remember to be patient with yourself, have some fun, and try to apply a few of these techniques to help you along.
© Alert Diver — Q3 Summer 2016